So your Divi Contact Form is up and running: you are getting emails from people contacting you through your website. The only problem? You can’t find the sender’s address! If this happened to you, you might have gotten quite frustrated with the Divi Contact Form and the missing email address. Fortunately, there is a very easy fix to this problem, and that email isn’t actually missing – you just need to know where to find it.
Find the sender’s email address now
So you’re looking at the email you got through the Divi Contact Form. There is the body of the email, the generic subject “New Message From [your website]” and in the “From” field, you have the sender’s name and the address mail@[yourdomain].
The only thing missing is the email address of the sender, right? If you double check your Divi Contact Form, the Email field is definitely there, and it’s a Required Field, so the form will not be sent if it’s not filled out. So why can’t you see it in your inbox?
No need to panic – it hasn’t really gone missing. As soon as you hit “Reply” to the email you got through the Divi Contact Form, the “To” field will automatically be filled in with the correct email address.
And if you are using an email client, that field might already be visible. For example, Mozilla Thunderbird has two separate fields while displaying an email. One is “From” (which will display the email address with your domain) and there is an additional field “Reply to” – where you can find the sender’s email address.
Divi Contact Form: how to put the email address inside the message?
Now, maybe you’re receiving tons of messages every day, or you just don’t want to click “Reply” every time you want to check the sender’s email address. No matter your reason, if you want to see the email address displayed inside the message, there’s an easy way to do it.
You just need to customize the Contact Form.
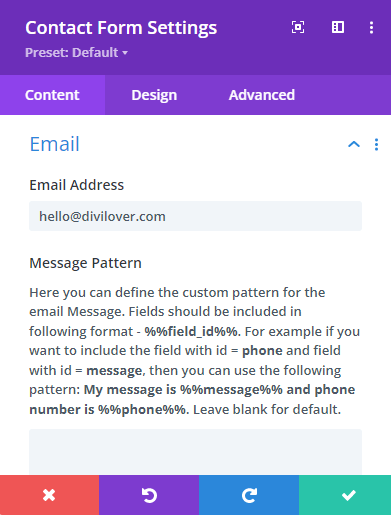
The default message pattern in the Divi Contact Form includes only the content of the message. But we can customize it to add other information: for example the sender’s email address, their name – or the content of any additional fields your Contact Form is using.
To do this, we will use the Divi pattern for including the content of a given field inside our message. The pattern is as follows: %%field_id%% – where field_id needs to be substituted with the proper field ID.
Find the field ID
Inside the Divi Builder, go into your Contact Form Module settings. Inside the Content tab, you’ll see all the fields your contact form is using – and each field has its little settings icon.
If you’re using the default settings here, it will look something like this:
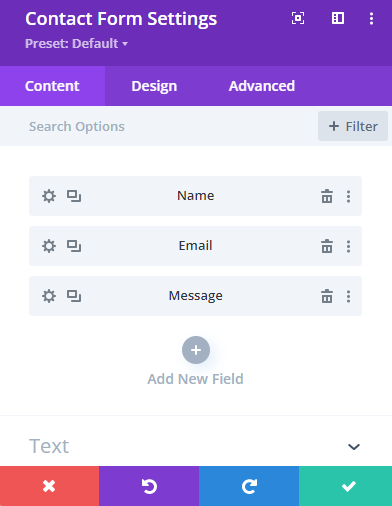
To check the Email field’s ID, simply click on the gear icon. You will see two settings there: Field ID and Title. Title is the name of the field that will be displayed in the form, and you can change it. And the ID is what we’ll use to put the sender’s email address inside the message content.
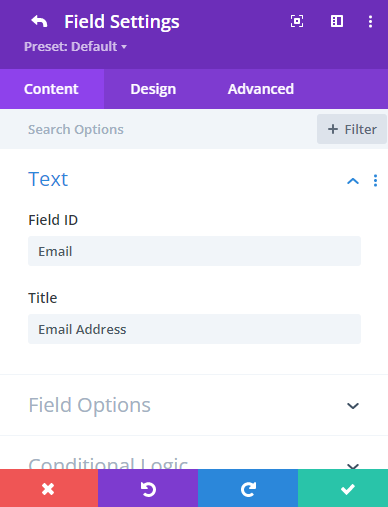
The default ID is Email – and if you’re using the default, you can simply go back to your module Content settings -> Email tab. You have already put in your email address there, the one the messages from the contact form are sent to.
Add the ID to the message pattern
Now, we will look at the second setting in this tab: Message Pattern.
It is blank by default, but we want the sender’s email address to be included in there. To do that, we’re going to use the correct pattern, so %%field_id%% – and our Email field’s ID, which is Email. The result is: %%Email%%.
You can also include the content of other fields inside your message pattern, using exactly the same steps.
Example of the customized Divi Contact Form
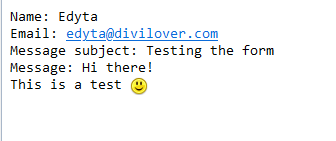
Here is our example, which includes all the default Divi Contact Form fields and one custom field:
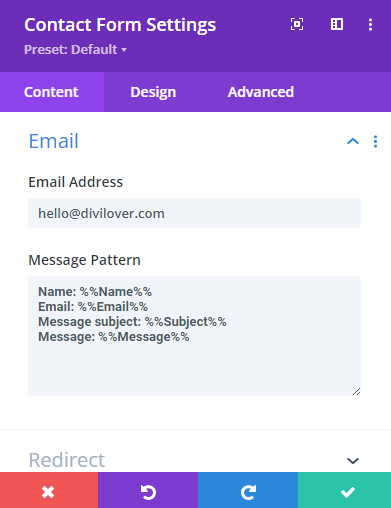
We also added the names of the respective elements for clarity, so for example: Name: %%Name%% and so on. These labels are very helpful to tell at a glance what you’re looking at. If you’d like to copy our message pattern, here it is! Just note that it will only work if your Divi Contact Form is using the default field IDs. You can skip the custom field.
Name: %%Name%%
Email: %%Email%%
Message subject: %%Subject%%
Message: %%Message%%
And here is what the resulting email sent from this contact form will look like with the customized message pattern:
And if you need some inspiration for a more advanced Divi Contact Form using conditional logic, you can check out the form used in Girly, our premium child theme for glamorous entrepreneurs! For more inspiration, look at the demo Contact pages in the other Divi Lover premium child themes.
Final thoughts
Did you find this Quick Divi Tip helpful? Let us know in the comments! And what kinds of custom fields, if any, have you added to your contact form? We’d love to know!


i did that and now when email is end out it looks great i see all fields, but now when trying to reply to that email with form fields received then it does reply to mail@dmain,,,,. any way to fix this? it should reply to the email that was input in the form. thnx
Thank you so much! You just made my day.
Works fine. Thanks for the solution!
Thank you for the awesome work and tutorials you do!