
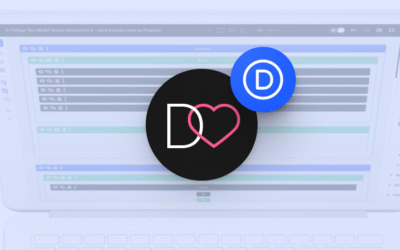
Add a Fun Heart Cursor Trail to Your Divi Site
Valentine’s Day is almost here! ❤️ And whether you love it or just tolerate the heart-shaped madness, we can all agree on one thing—once a year, a little bit of extra sparkle and playfulness doesn’t hurt.
Now, I’m not saying you should flood your site with pink gradients and autoplaying romantic ballads (please, don’t do that). But if you’re feeling even a tiny bit festive, I’ve got a simple, fun CSS + jQuery trick for you—a floating heart cursor effect that adds just the right amount of Valentine’s vibes without going overboard.
And hey, if you’re reading this during Valentine’s season, you should see the effect live on this blog! If not, here’s a quick preview of how it looks in action:

Let’s dive in!
Step 1
Add the jQuery Code
Since our effect relies on dynamically generating hearts as the cursor moves, we need to add a script that listens for mouse movement and appends heart elements to the page.
📌 Go to Divi → Theme Options → Integration and paste the following code into the "Add code to the <body>" section:
<script>
jQuery(document).ready(function($) {
    let lastMove = 0;

    // Define the heart SVG
    let heartSVG = `<svg class='dl-heartbeat' viewBox="0 0 24 24" xmlns="http://www.w3.org/2000/svg">
        <path d="M12 21.35l-1.45-1.32C5.4 15.36 2 12.28 2 8.5 2 5.42 4.42 3 7.5 3c1.74 0 3.41.81 4.5 2.09C13.09 3.81 14.76 3 16.5 3 19.58 3 22 5.42 22 8.5c0 3.78-3.4 6.86-8.55 11.54L12 21.35z"/>
    </svg>`;

    $(document).mousemove(function(e) {
        let now = Date.now();

        // Generate a heart every 200ms (prevents excessive elements)
        if (now - lastMove > 300) {
            lastMove = now;

            let heart = $(heartSVG);
            $("body").append(heart);
            heart.css({
                left: e.pageX + "px",
                top: e.pageY + "px"
            });

            // Remove the heart after animation ends
            setTimeout(function() {
                heart.remove();
            }, 1200);
        }
    });
});
</script>
🔍 Explanation of the jQuery Code:
jQuery(document).ready(function($) { ... }); Ensures the script runs only when the page is fully loaded.
let heartSVG = ... Defines the heart shape as an inline SVG.
$(document).mousemove(function(e) { ... }) Detects cursor movement and triggers the heart generation.
if (now - lastMove > 300) { ... } Limits how often hearts appear (once every 300ms) to prevent clutter.
$("body").append(heart); Adds the heart to the page dynamically.
.css({ left: e.pageX + "px", top: e.pageY + "px" }) Positions the heart at the cursor’s location.
setTimeout(function() { heart.remove(); }, 1200); Removes hearts after they finish animating to keep the page smooth.
Step 2
Add the CSS for the Floating Effect
Now that our jQuery script creates hearts dynamically, we need CSS to style them and make them float upwards before disappearing.
📌 Go to Divi → Theme Options → Custom CSS and paste this code:
.dl-heartbeat {
    position: absolute;
    z-index:999;
    width: 32px;
    height: 32px;
    fill: #e25555; /* Heart color */
    opacity: 1;
    pointer-events: none;
    animation: heartFloatUp 1.2s ease-out forwards;
}

@keyframes heartFloatUp {
    0% { transform: translate(-50%, -100%) scale(1); opacity: 1; }
    100% { transform: translate(-50%, -200%) scale(1.4); opacity: 0; }
}

body.et-fb .dl-heartbeat {
	display:none;
}
🔍 Explanation of the CSS Code:
.dl-heartbeat This class is applied to the heart SVG when it’s dynamically created.
position: absolute; Ensures each heart appears exactly where the cursor is.
z-index: 999; Ensures the hearts appear above other elements on the page (adjust if needed).
width: 32px; height: 32px; Increases the heart size for better visibility.
fill: #e25555; Sets the heart color (you can change this).
pointer-events: none; Prevents hearts from interfering with user interactions.
opacity: 1; Ensures the heart is fully visible at the start.
animation: heartFloatUp 1.2s ease-out forwards; Controls the floating and fading effect.
Animation Details:0% { transform: translate(-50%, -100%) scale(1); opacity: 1; }
At the start, the heart appears slightly above the cursor, ensuring it’s centered at the top middle of the cursor.100% { transform: translate(-50%, -200%) scale(1.4); opacity: 0; }
As it animates, the heart floats further up (-200%), grows slightly, and fades out.
This keeps the effect smooth and prevents hearts from covering the cursor while maintaining a natural floating motion. The last bit of the code ensures hearts won’t clutter the Visual Builder while editing the page.
Step 3
Save & Refresh Your Site
Click "Save Changes" in Divi Theme Options, refresh your website and move your mouse – you should now see hearts floating behind your cursor! 💖
And that’s it!
You now have a lightweight, animated floating heart cursor effect in Divi, built entirely with CSS and jQuery. Perfect for Valentine’s season, romantic websites, or simply adding a bit of fun to your design!
📢 If you use this effect, share your site in the comments below or in our Divi Lovers Facebook group! We’d love to see it in action!


Thanks Ania. I’ve added it to some of my clients’ sites. Is there a way to have this showing on mobile as well?
You’re welcome! The effect already works on mobile, but since there’s no cursor there, the hearts appear when you tap the screen.
Oh thank you Ania, I’ll take care of it to put it on my site and see the rendering and the effect. 🥰👍 I love this kind of mini tutorial.
I’m glad you like it! 🙂
Thank you Ania! Is there any way to restrict it to certain pages?
Hi! Yes, to use the effect on one specific page, you can use a Code module to place the jQuery code (instead of adding it gloablly in the Integration tab). The CSS can stay in the Theme Options, or you can move it to this page settings 👌