How to Reveal a Hidden Section on Click in Divi?
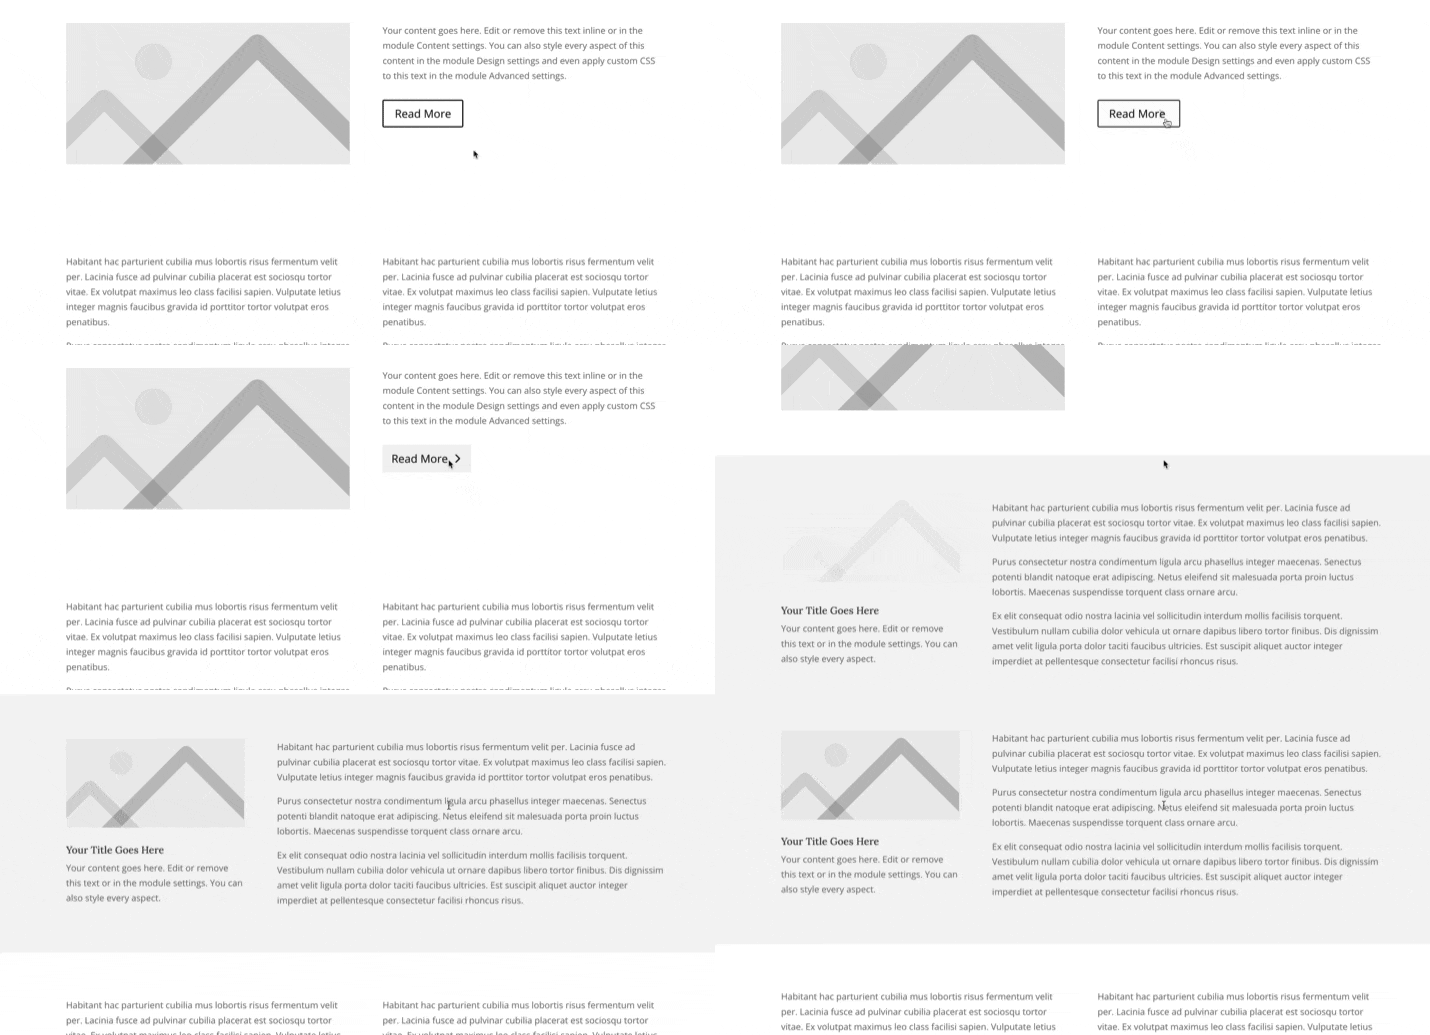
In this tutorial, I will show you how to reveal a hidden section on click with jQuery. It’s quite easy with bit of code, and I will also show you how to add (or remove) a nice automatic scroll once the hidden section is revealed.
You can watch the video tutorial on YouTube or read the instructions below, or do a combination of both, whatever you prefer. If you’d like to be the first to know whenever I post a new video tutorial, I encourage you to subscribe to my YouTube channel and hit the notification bell to get updates.
Just one quit note here: if you're just starting out with custom coding or want to brush up your skills, we have a free CSS in Divi Beginner Guide.
All right, let’s get started!
Step 1
Create a button trigger
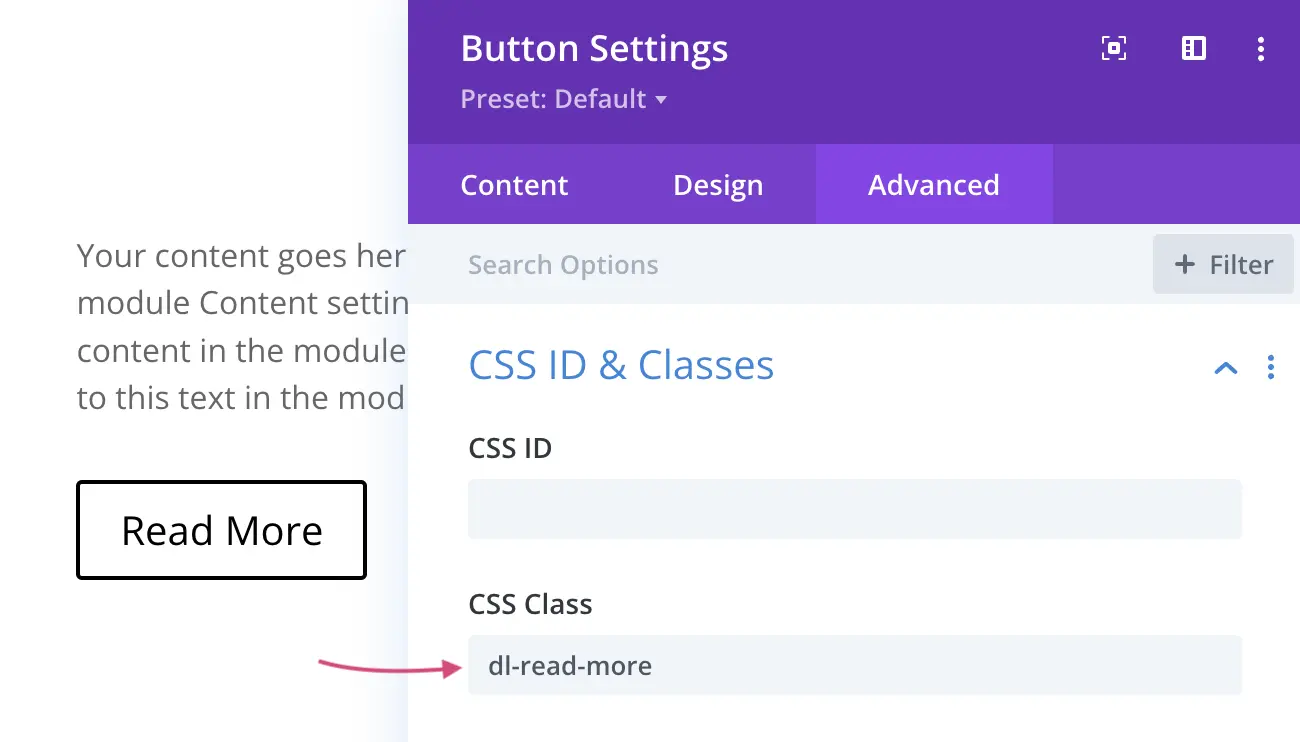
The example I'm showing you in the video is using a Divi Button module as a trigger. To make it work, add a custom CSS class of dl-read-more to the Button Settings -> Advanced tab.
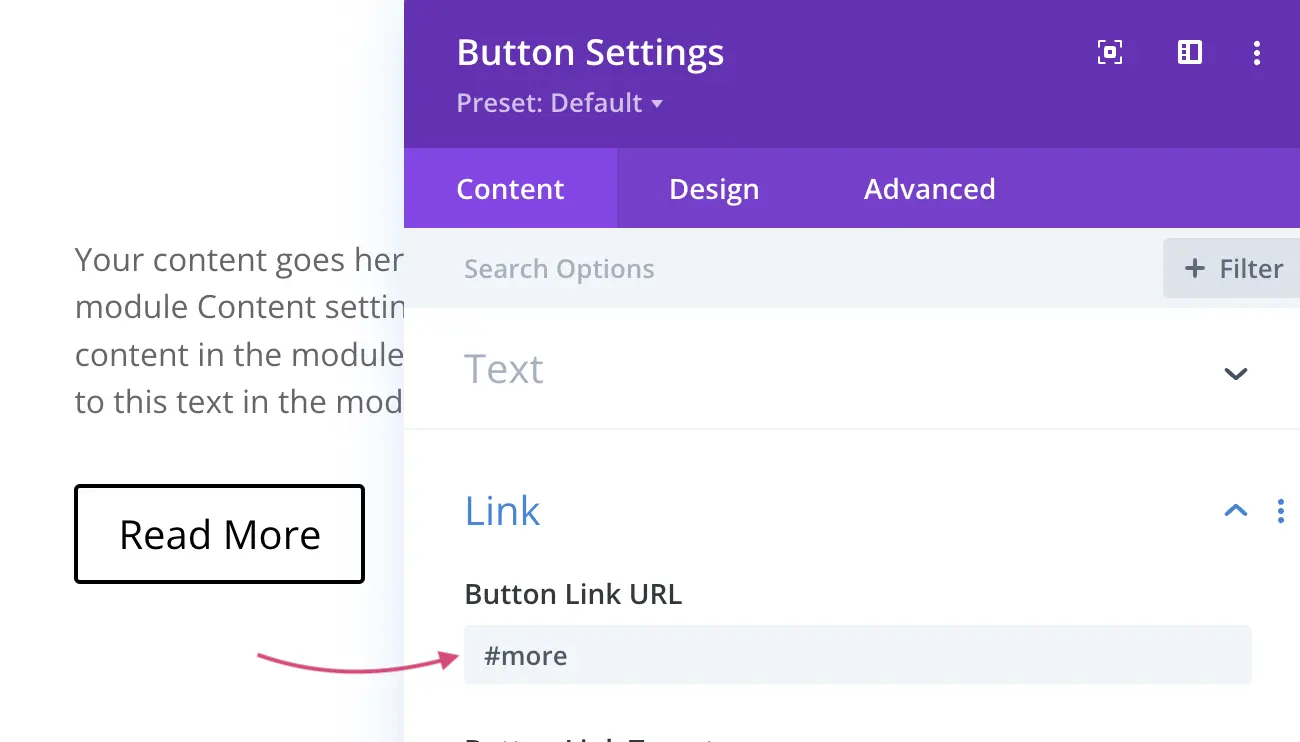
Make sure that the Button Link URL in the Content tab is an anchor link and uses the ID of the hidden section with the hashtag symbol. In our example it's #more.
Step 2
Create a section to hide
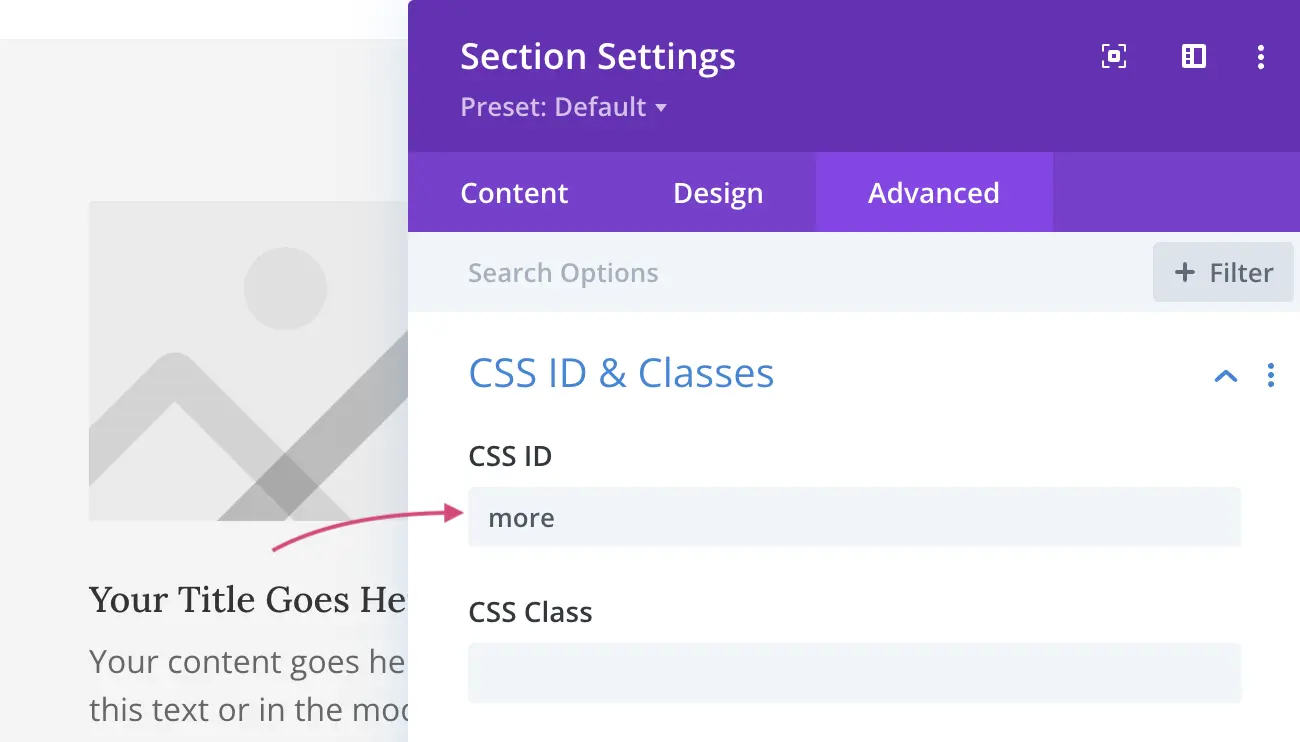
Add a new section which will be hidden initially. Make sure to set the correct CSS ID in the Advanced tab. It needs to match the Button URL from Step 1. In our example the ID is more (without the hash symbol).
Step 3
Use CSS to hide the section
We are targeting the section with CSS to hide it, but only on the front-end. The section will remain visible in the Visual Builder, so that you can easily edit it if needed.
body:not(.et-fb) #more {
    display:none;
}
Step 4
Use jQuery to show the section on button click
The jQuery script can be placed inside a Code module directly on your page, or (if it's a functionality you'd like to use globally in various places on your website) inside the Theme Options Integration tab. When the Button with dl-read-more CSS class is clicked, it will slide down the section with ID more and it will hide the button itself (since we are not doing read more/read less - the button is no longer needed).
<script>
jQuery(document).ready(function($) {
	$('.dl-read-more').click(function(){
		$('#more').slideDown();
		$(this).hide();
	});
});
</script>
Optional
Modify the code to prevent the page scroll
The jQuery script can be placed inside a Code module directly on your page, or (if it's a functionality you'd like to use globally in various places on your website) inside the Theme Options Integration tab. When the Button with dl-read-more CSS class is clicked, it will slide down the section with ID more and it will hide the button itself (since we are not doing read more/read less - the button is no longer needed).
<script>
jQuery(document).ready(function($) {
	$('.dl-read-more').click(function(e){
		e.preventDefault();
		$('#more').slideDown();
		$(this).hide();
	});
});
</script>
How to use this method for multiple sections?
The example I showed you in the video walkthrough using the code above will only work in one place - with one button and one section. Follow the steps below and modify the code so that it can be used for multiple sections on one page.
1. Each button URL and section ID needs to have corresponding name (just like we used "more" in our single-section example).
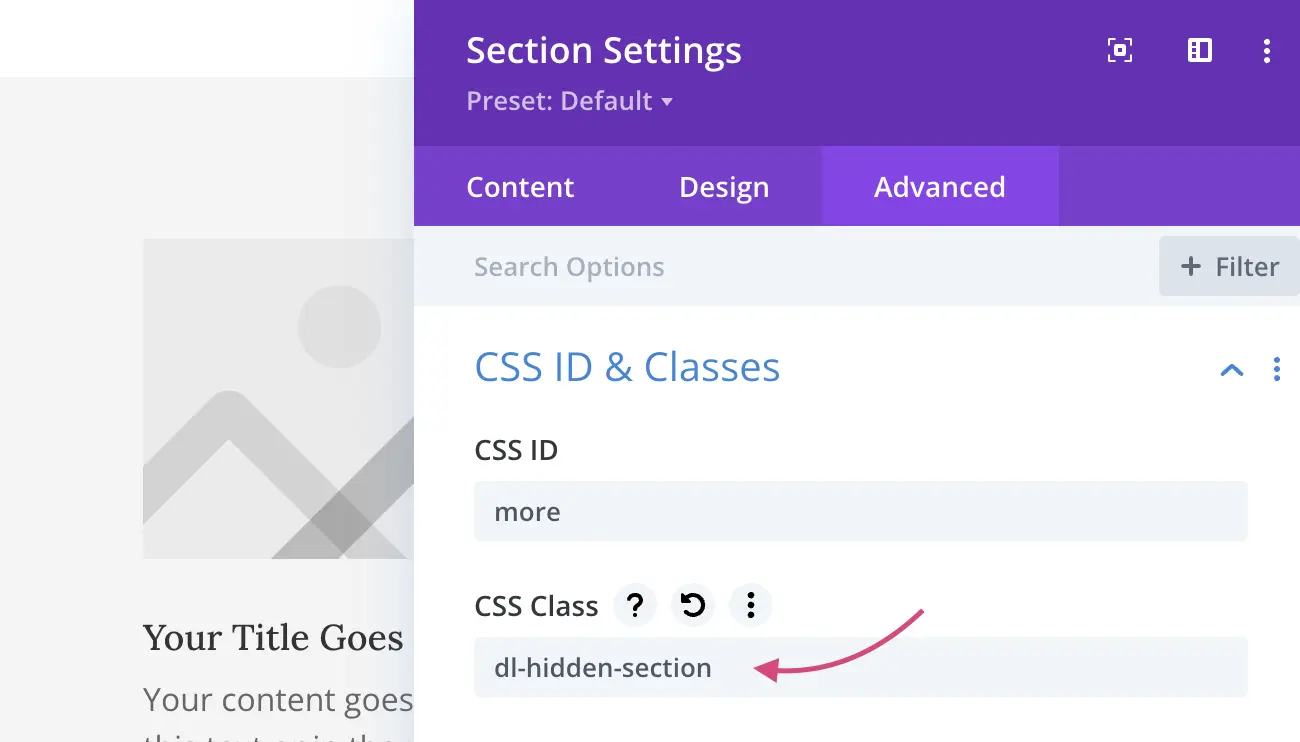
2. Every button will still use the custom CSS class of dl-read-more and every hidden section could also use a CSS class, eg. dl-hidden-section. This way, you'll be able to target (and hide!) every section at once with this modified CSS code:
body:not(.et-fb) .dl-hidden-section {
    display:none;
}
<script>
jQuery(document).ready(function($) {
	$('.dl-read-more').click(function(){
		target = $(this).attr('href');
		$(target).slideDown();
		$(this).hide();
	});
});
</script>
Or this code below, if you'd like to prevent the page scroll:
<script>
jQuery(document).ready(function($) {
	$('.dl-read-more').unbind().click(function(e){
		e.preventDefault();
		target = $(this).attr('href');
		$(target).slideDown();
		$(this).hide();
	});
});
</script>
And that's it!
I hope you enjoyed this tutorial, and I hope everything was clear and accessible. If you happen to use these tips, please let me know in the comments! I always love seeing your feedback, it helps me see if you find my content helpful and if I should make more tutorials like this one.
And if you have any questions, you can ask them in the comments below or in my Divi Lovers Facebook group. It's a fantastic community of Divi users and web designers where we share useful tips and tricks.

This is AWESOME! Can you tell me how hidden content impacts page load and SEO? Specifically, does the content still download even if it isn’t visible? And does Google see the content in the code even if it isn’t visible?
Thanks so much!
Hi and thanks for this tutorial! Is there a way, that the button is still visible to close it?
Regards
Arndt