Updated for Divi 5: The slide-in header from this tutorial still works in Divi 5: I tested the CSS and the jQuery on new Divi 5 sections and on the converted free layouts. Divi 5 also lets you do it without any JavaScript, using Interactions, and both Divi 5 and Divi 4 now have a built-in Sticky Position setting for a simple fixed header.
Does Divi have a fixed header setting?
Yes. When I first wrote this post, the brand new Divi Theme Builder let us design website headers with the Divi Builder, but there was no setting (as of yet) to turn the Menu or Fullwidth Menu module into a fixed bar that always stays visible on top of the page when you scroll down. Since then Divi got a native one: open the section settings and go to Advanced tab ➜ Scroll Effects ➜ Sticky Position ➜ Stick to Top (same place in Divi 5 and Divi 4).
If you're a visual learner, here's the video version of this tutorial:
The video was recorded in Divi 4. The steps and the code are the same in Divi 5; only the place where you add a CSS class has moved (Advanced tab ➜ Attributes, see Step 1).
Making the header fixed at the top of the page
The simplest (though not really ideal) code solution is to use this bit of CSS for your header section:
position:fixed;
top:0;
width:100%;
z-index:99;
You can add this code in the Advanced tab of the section settings, in the Main Element CSS box. In Divi 5: Advanced tab ➜ CSS ➜ Module Elements ➜ Main Element; in Divi 4: Advanced tab ➜ Custom CSS ➜ Main Element. It will make your section "stick" to the top of the page. Unfortunately this only works well if your header is narrow. If your header area is big, making it fixed may not work well, as it might cover too much of the browser window, especially on smaller screens. The same goes for the Sticky Position setting.
Why use a separate slide-in section for the fixed header?
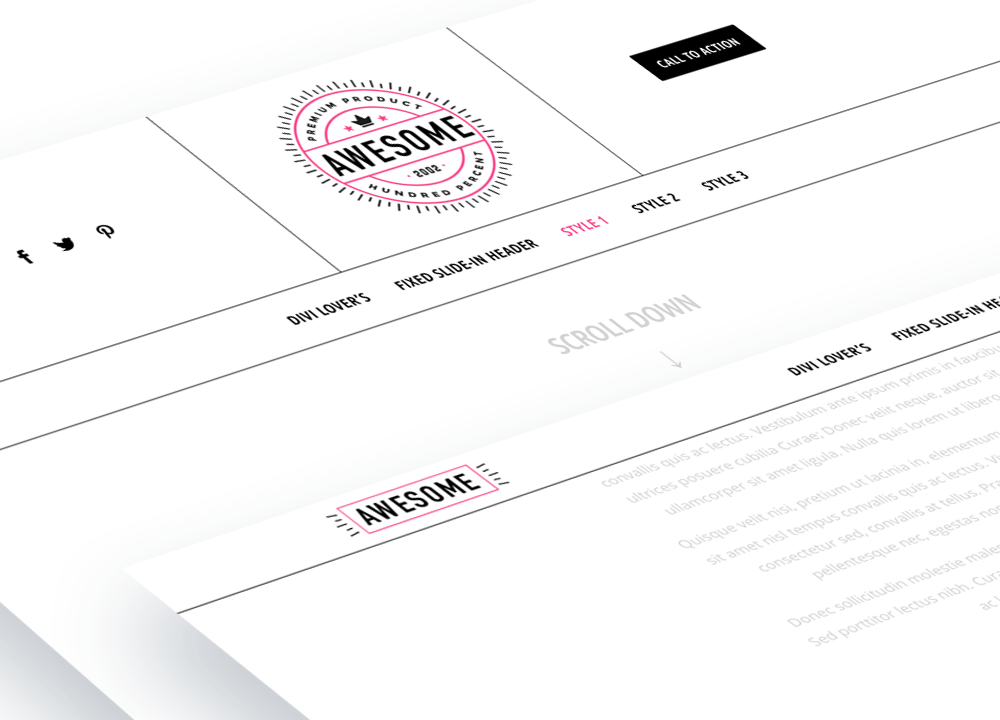
Because a big header that stays fixed covers too much of the screen. A separate, slim section that slides in only after the visitor scrolls lets you keep a large "normal" header and show a compact fixed bar with a different design.
This is what I mean:
Read on for the step-by-step instructions on how to recreate this effect, or download my pre-designed header layouts with a sleek slide-in navigation (at the end of this post), which you can simply import and use on your projects! You can see them in action here: Style 1, Style 2 and Style 3.
How to create a fixed slide-in header in Divi
You need two header sections, the CSS class dl-fixed-header on the second one, a few lines of CSS that hide it above the screen, and a short script that adds the class dl-scrolled after the page has been scrolled, which slides the section in.
Step 1. Create two header sections
This approach allows us to design a completely different look for each header state. Let's say you have two different logo images: a big one, used as the main logo in the centered navigation, and a horizontal logo version, which can be used for a slide-in fixed nav. Or, a different scenario, you don't need the full navigation in the fixed nav, maybe you'd just like to keep a call to action button to draw your visitor's attention. With two separate header sections the possibilities are endless!
Create each section using the Divi Builder. If you want the header on every page, build both sections in your Theme Builder header (Divi ➜ Theme Builder ➜ Add Global Header ➜ Build Global Header). Then add a custom CSS class of dl-fixed-header to the second section:
- Divi 5: section settings ➜ Advanced tab ➜ Attributes ➜ Add Attribute ➜ CSS Class, value
dl-fixed-header - Divi 4: section settings ➜ Advanced tab ➜ CSS ID & Classes ➜ CSS Class
We are going to hide this section with CSS and then use a simple JavaScript function to show it after the page has been scrolled by a certain number of pixels.
Step 2. Add the CSS code
Add this CSS code to Divi ➜ Theme Options ➜ General ➜ Custom CSS or to your child theme stylesheet. Note that we are setting the top position to 0. Instead of moving the section outside of the viewport with top:-100%, we are going to use the transform property with translateY, which is smoother to animate with a transition (performance-wise).
body:not(.et-fb) .et_pb_section.dl-fixed-header {
	position:fixed;
	top:0;
	width:100%;
	transform: translateY(-100%);
	transition: 0.3s transform ease-in-out;
	z-index:99;
}
The :not(.et-fb) selector makes sure our header is fixed only on the frontend and not when the Divi Builder is enabled (Divi 5 still adds the et-fb class to the body in the Visual Builder), otherwise it might be a bit hard to access the section settings and other Builder controls.
The CSS code below makes sure the fixed section is displayed correctly for logged-in users (when the WordPress admin bar is visible):
body.admin-bar:not(.et-fb) .et_pb_section.dl-fixed-header {top:32px;}

@media (max-width:782px) {
	body.admin-bar:not(.et-fb) .et_pb_section.dl-fixed-header {top:46px;}
}

@media (max-width:600px) {
	body.admin-bar:not(.et-fb) .et_pb_section.dl-fixed-header {top:0;}
}
And the final bit of code: when the header gets the CSS class dl-scrolled (which we are going to add dynamically with jQuery in a moment), this moves it back to its default position:
body:not(.et-fb) .et_pb_section.dl-fixed-header.dl-scrolled {
	transform: translateY(0);
}
Step 3. Add the JavaScript
Add this jQuery code to a Code module in your header (or on the page), or to Divi ➜ Theme Options ➜ Integration ➜ Add code to the < head > of your blog. You can also enqueue a custom JS file via your child theme. I wrote a separate blog post with detailed instructions on adding JavaScript code to Divi.
You can change the 150 value to one that matches your design. It is the number of pixels the page needs to be scrolled before the fixed header slides down.
<script>
jQuery(document).ready(function($){
	$(window).on('scroll', function(){
		var topOffset = $(window).scrollTop();
		var fixedSection = $('.dl-fixed-header');

		if (topOffset >= 150) {
			fixedSection.addClass('dl-scrolled');
		}
		else {
			fixedSection.removeClass('dl-scrolled');
		}
	}).trigger('scroll');
});
</script>
Divi 5 loads jQuery deferred (in the footer) by default, and the code is wrapped in jQuery(document).ready(), so it works in Divi 5 wherever you add it. I also added .trigger('scroll') at the end, so the fixed header shows up straight away when someone reloads the page halfway down.
And that's it! This is all the code you need to create a slide-in fixed section. Hope you'll find it useful. I'd love to see how you use it on your websites, share your headers in my Divi Lovers Facebook group!
How to show the fixed header without jQuery in Divi 5
In Divi 5 you can replace the jQuery from Step 3 with two Interactions on the big header section: Viewport Exit adds the class dl-scrolled to the fixed section, and Viewport Enter removes it. Keep the CSS from Step 2, it does the actual sliding.
- Open the settings of your first (big) header section and go to Advanced tab ➜ Interactions ➜ Add Interaction.
- Set the trigger to Viewport Exit and the effect to Add Attribute. Choose the fixed header section as the target, then enter the attribute name
classand the valuedl-scrolled. - Add a second interaction: trigger Viewport Enter, effect Remove Attribute, the same target, name
classand valuedl-scrolled. - Save and test it on the frontend.
The difference: the fixed header slides in when the big header has completely left the screen, instead of after a set number of pixels. For most designs that's exactly the right moment, and there's no script to maintain.
Prefer a single header that just stays on top? Use the Sticky Position setting mentioned above, or check my guide to a transparent fixed (sticky) header in Divi.
Grab the free slide-in fixed header layouts!
The free download includes three ready-made header designs, each with a standard and a fixed header section, the CSS and the jQuery, and they work in Divi 5 and Divi 4.
I created three different header designs, which you can download and use on any Divi website! Each layout includes a standard and a fixed header section with some custom styling. Check out the demo page and feel free to download the JSON files!
Free download
Fixed Slide-In Header Layouts
Three header designs with a big default header and a slim fixed header that slides in on scroll, CSS and jQuery included. Works in Divi 5 and Divi 4.
Get the free downloadAfter the import, pick your own menu in the Menu modules and replace the sample logos. In Divi 5 the layouts are converted automatically when you import them; I tested all three, and the slide-in and the mobile menus work.