Updated for Divi 5: The stacked cards effect uses Divi's built-in Sticky Position (Advanced ➜ Scroll Effects), which works the same way in Divi 5. I tested the layout in Divi 5: the cards still stack, the last card still "unsticks", and the free Divi 4 layout converts to Divi 5 without changes.
Add playful scroll magic to your Divi page in just a few clicks
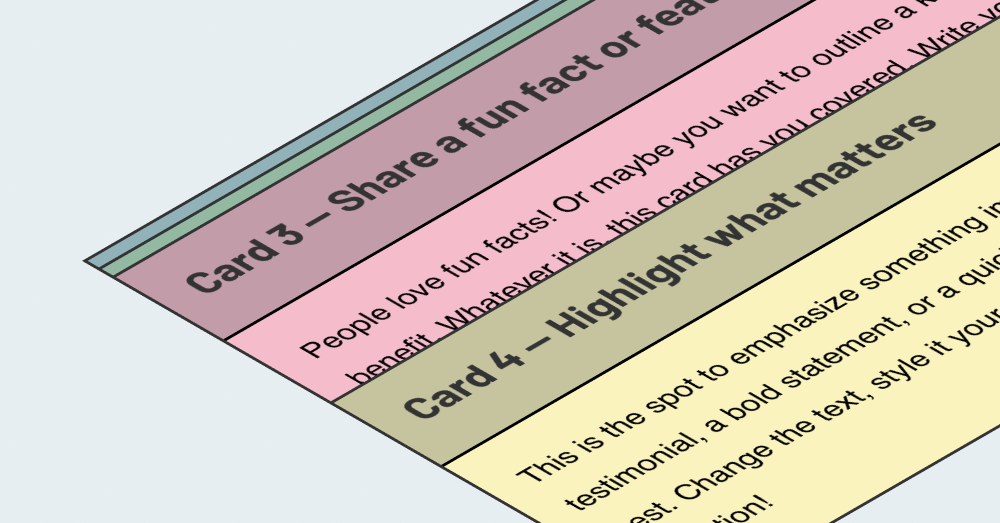
Stacked Cards is a free Divi layout where each card sticks near the top of the screen as you scroll, and the next card slides over it, so the cards pile up like a little deck.
Looking for a subtle but impressive scroll effect that instantly makes your design feel more dynamic? Say hello to Stacked Cards for Divi, a free layout you can download and use right away. No CSS, no complicated setup, just clever use of Divi's built-in scrolling effects.
Fun fact: I originally created this layout to answer a question from one of my amazing students inside the Divi Stylist Academy, and it turned out so fun that I had to share it with all of you! 😄
Want to see it in action first? Scroll through the demo page.
Free download
Stacked Cards on Scroll Layout
A Divi page with five cards that stack on top of each other as you scroll, made with Divi's own sticky settings, no code. Works in Divi 5 and Divi 4.
Get the free downloadHow do stacked cards work in Divi?
Each card is a Row with Sticky Position set to Stick to Top, and every card gets a slightly bigger Sticky Top Offset (50px, 60px, 70px, 80px), so the cards pile up with a thin edge of each one still showing.
The effect is super simple but looks impressive! Each "card" is actually a Row with scroll effects and offset settings. As you scroll, the cards stack one on top of the other, creating that fun layered feel.
The key details
The last card sits inside its own section, with no scrolling effects applied. That's what lets it smoothly "unstick" and scroll up, revealing the content below.
Every section after the stacked cards needs a z-index value set (anything other than auto). This keeps everything layered and scrolling beautifully.
How to build stacked cards in Divi 5, step by step
You need one section with the sticky cards, a second section with the last card, and a z-index on every section below. These are the exact settings used in the free layout, so you can rebuild it from scratch or adjust the downloaded version.
Step 1: Create the section for the stacked cards
- Add a regular section with a single-column row inside.
- Give the section a background color and some top padding (110px in the layout). Set its bottom padding to 0px, so the last card follows right after the stack.
- In the layout, the section also has Advanced tab ➜ Visibility ➜ Horizontal Overflow and Vertical Overflow set to Hidden.
Step 2: Style the first row as a card
- Background: a solid color (each card gets its own color).
- Design tab ➜ Border: 2px border.
- Design tab ➜ Sizing: Max Width 600px.
- Design tab ➜ Spacing: Bottom Margin 100px. This is the scroll distance before the next card arrives.
- Advanced tab ➜ Position ➜ Z Index: 1.
Add your content inside (the layout uses a Text module for the heading, a Divider and a Text module for the paragraph).
Step 3: Make the row sticky
Open the row's Advanced tab ➜ Scroll Effects (same place in Divi 4 and Divi 5) and set:
- Sticky Position: Stick to Top
- Sticky Top Offset: 50px
- Offset From Surrounding Sticky Elements: toggled off (in Divi 4: No)
Turning off "Offset From Surrounding Sticky Elements" is what makes the cards land on top of each other. With it on, Divi sticks every card below the one that is already stuck, so the cards line up under each other and run off the screen.
Step 4: Duplicate the row for more cards
Duplicate the row for each card, change the background color and the content, and raise the Sticky Top Offset by 10px for every next card: 60px, 70px, 80px. The growing offset is what leaves a thin strip of each card visible in the stack.
Step 5: Put the last card in its own section
Add a new section right below, with the same background color, top padding 0px and Z Index 1 (Advanced tab ➜ Position). Move the last card (row) into it and turn its Sticky Position back to Do Not Stick. This card scrolls normally, slides over the stack, and then moves up with the rest of the page.
Step 6: Give every section below a z-index
Sticky rows stay fixed at the top of the screen, even after you scroll past them. Every section below the stacked cards needs Advanced tab ➜ Position ➜ Z Index set to a number (1 is enough), so it scrolls over the stuck cards and covers them. Without it, the cards show through the content below.
What is different in Divi 5?
The settings are the same: Sticky Position, Sticky Top Offset and Offset From Surrounding Sticky Elements are still in Advanced tab ➜ Scroll Effects, and Z Index is still in Advanced tab ➜ Position. Divi 5 still uses its own sticky script, so the cards behave exactly like in Divi 4.
One small difference: new sections in Divi 5 use a flex layout with a Vertical Gap between rows (60px in my test), so in a section you build from scratch in Divi 5, the cards sit a bit farther apart than in the downloaded layout. If you want them closer, lower the Vertical Gap in the section's Design tab ➜ Layout, or reduce the rows' Bottom Margin. The downloaded layout keeps its original spacing after the conversion.
Watch the walkthrough
The video shows how to recreate the whole layout using only Divi's built-in settings, no custom code needed.
Want to see exactly how this scroll effect was built? In this step-by-step video tutorial, I'll show you how to recreate the layout. 👇 Watch below and follow along!
The video was recorded in Divi 4. In Divi 5 you'll find every setting under the same name and in the same place; only the Vertical Gap between rows in new Divi 5 sections is new (see above).
Why aren't my stacked cards working?
Most problems come from one of three settings: the surrounding offset, the z-index, or the last card's section. Check these first:
- The cards line up under each other instead of stacking: turn off Offset From Surrounding Sticky Elements on every sticky row.
- The cards show through the content below: add a Z Index (for example 1) to every section after the stacked cards.
- The last card never scrolls away: it must sit in its own section, with Sticky Position set to Do Not Stick.
- All cards cover each other completely: give every card a bigger Sticky Top Offset than the one before (50px, 60px, 70px…).
And that's it!
This little layout idea actually started with a question from one of my students inside Divi Stylist Academy. I love when those "what if…" moments turn into something everyone can play with.
Have you used the stacked cards on your site? Share it in my Divi Lovers Facebook group. And if you need 1-on-1 help, check out the ways to work with me.