Updated for Divi 5: I tested the HTML, CSS and jQuery from this tutorial in Divi 5.18, and the bubble works just like in Divi 4: it fades in after 2 seconds and closes with the X. I also added a version built with Divi 5 modules and Interactions, with no JavaScript.
What is a bubble popup link?
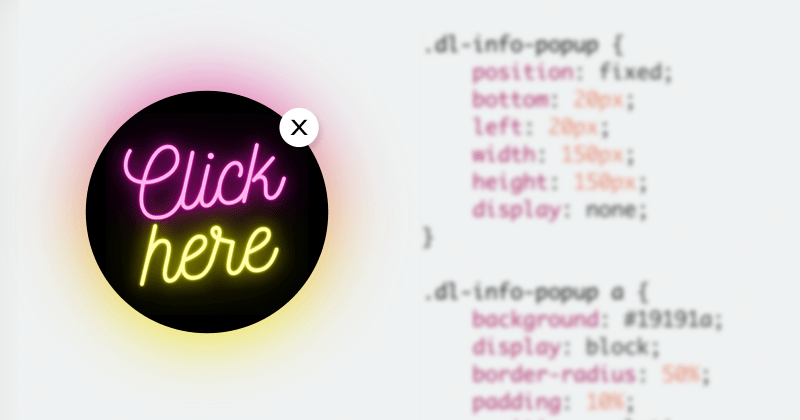
A bubble popup link is a small round image link fixed in a corner of the screen. It appears a moment after the page loads, follows the visitor on every page, and can be closed with a small X.
There are certain situations when you want to display some information relevant to all your website visitors, no matter the page they are currently viewing. In many cases, that would be a time-sensitive offer or a Call to Action. A popular approach is to use the top "promo bar", and the full-page popup is another option to consider. Here, on the Divi Lover website, I like to use a fixed round image displayed in the corner of the screen (I call it the bubble popup), and we use it every time we are having a sale or a new product launch.
Watch the video below to see how to create it in Divi step by step.
The video was recorded in Divi 4. The code is the same in Divi 5, and Divi → Theme Options → Integration, where you paste it, works the same way.
Want to see it in action? Here's the live preview.
How to add a bubble popup link to Divi with code
You need three pieces: the HTML structure in Divi → Theme Options → Integration (body code), the CSS that places and styles the bubble, and a few lines of jQuery that fade it in and close it. Because the code lives in Theme Options, the bubble shows on every page of your website, with no plugins.
Step 1: Add the HTML structure
Navigate to the Divi Theme Options Integration tab, turn on "Enable body code" and paste the code below into "Add code to the < body >". Change /landing-page to the page you want to link to, and the image URL to your own image:
<div class="dl-info-popup">
	<div class="bg"></div>
	<a href="/landing-page">
		<img src="https://demos.divilover.com/wp-content/uploads/2021/07/click_here.png" alt="Super Offer"/>
	</a>
	<span class="close"></span>
</div>
Step 2: Style it with CSS
This is the CSS code I've used, feel free to modify it to fit your design. Add it to Divi → Theme Options → General → Custom CSS (or your child theme stylesheet):
.dl-info-popup {
	position: fixed;
	bottom: 20px;
	left: 20px;
	width: 150px;
	height: 150px;
	display: none;
}

.dl-info-popup a {
	background: #19191a;
	display: block;
	border-radius: 50%;
	padding: 10%;
	position: relative;
	z-index: 2;
	width: 100%;
	height: 100%;
}

.dl-info-popup span.close {
	position: absolute;
	top: 5px;
	right: 0;
	width: 30px;
	height: 30px;
	background: #fff;
	border-radius: 15px;
	box-shadow: 1px 3px 15px rgba(0,0,0,0.2);
	cursor: pointer;
	z-index: 3;
}

.dl-info-popup span.close:before {
	display: block;
	position: absolute;
	top: 0;
	right: 0;
	bottom: 0;
	left: 0;
	color: #19191a;
	font-size: 24px;
	font-family: 'ETmodules';
	content: '\4d';
	line-height: 30px;
	text-align: center;
}

.dl-info-popup .bg {
	display: block;
	width: 100%;
	height: 100%;
	position: absolute;
	background: #FDFA00;
	background-image: linear-gradient(-15deg, #FDFA00, #FF19CF);
	border-radius: 50%;
	z-index: 1;
	filter: blur(30px);
	animation:opacity 3s ease-in-out infinite;
}

@keyframes opacity {
	0% {opacity:0;}
	50% {opacity:1;}
	100% {opacity:0;}
}
Step 3: Make it work with jQuery
This JavaScript code can be added in the Integration tab, just next to the HTML structure. It shows the bubble 2 seconds after the page loads (delay(2000), in milliseconds) and fades it out when someone clicks the X:
<script>
jQuery(document).ready(function($){

	$('.dl-info-popup').delay(2000).fadeIn();
	$('.dl-info-popup .close').click(function(e){
		e.preventDefault();
		$(this).parent().fadeOut();
	});

});
</script>
In Divi 5, jQuery is loaded in the footer by default. The code above still works, because it is wrapped in jQuery(document).ready(): Divi runs it once jQuery has loaded.
Step 4 (optional): Hide it on a specific page
If you'd like to hide the "bubble" on a specific page of your website, you'd need to inspect that page to see what CSS class is added to the BODY element. Each page in WordPress has a unique ID, and this ID is attached to the body tag as a class, e.g. page-id-123. Once you know your page body class, you can target and hide the bubble popup element with this bit of CSS code:
body.page-id-123 .dl-info-popup {
	display: none!important;
}
How to build the bubble popup with Divi 5 Interactions (no code)
In Divi 5 you can also build the bubble from modules: a Group set to Position Fixed holds your image and a close icon, and Interactions show it after 2 seconds and hide it when the X is clicked. Only the glowing gradient behind the image still needs the CSS from Step 2.
- Add a Group module where the bubble should appear. To show it on every page, add it to your Global Footer in the Theme Builder.
- In the Group settings, go to Advanced → Position: set Position to Fixed, place it in the bottom left corner with a 20px offset, and give it a Z Index of 99. In Design → Sizing, set the Width to 150px.
- Inside the Group, add an Image module with your image, set the Image Link URL in Content → Link, and round its corners to 50% in Design → Border.
- Add an Icon module with an X icon, set its Position to Absolute in the top right corner (Advanced → Position) and make it smaller in the Design tab.
- On the Group, go to Advanced → Interactions → Add Interaction. First: Trigger Event Load, Effect Action Hide Element, Target Module: the Group itself. Second: Trigger Event Load, Effect Action Show Element, Target Module: the Group, Time Delay 2000ms.
- On the Icon, add one interaction: Trigger Event Click, Effect Action Hide Element, Target Module: Parent Container (the Group).
I tested this on a Divi 5 page: the bubble appeared after 2 seconds, stayed fixed in the corner and disappeared when I clicked the X. The difference from the jQuery version is that Hide Element removes the bubble at once, without the fade-out.
Final thoughts
I hope you like this approach and this walkthrough. If you build your own bubble popup, I'd love to see it: share it in my Divi Lovers Facebook group.