Updated for Divi 5: I imported all three pages of this layout pack into Divi 5 and they look and animate the same as in Divi 4. After the import, connect your email provider in the Email Optin module (Content → Email Account), so the form can add people to your list.
How to create a Divi lead magnet page that sells
A lead magnet page that sells needs three things: an opt-in page that shows off your freebie next to a short sign-up form, a page that asks people to confirm their e-mail, and a download page. This free Divi layout pack gives you all three, ready to import.
If you’re a blogger or interested in popularizing your business and getting more clients, you must know what wonders good lead magnets do. They build your e-mail list and gather your target group in a very convenient place that you can reach every time you want to sell.
Creating an engaging and interesting lead magnet is one thing, the next is wrapping it in shiny “paper” that will attract your clients even more. We happen to be in possession of such a paper, and we want to share it with you! What is it, you ask?
It’s a Divi lead magnet page: beautiful, yet simple and very pleasing to the eye. Just see for yourself!
Free download
Lead Magnet Opt-in Page Layout Pack
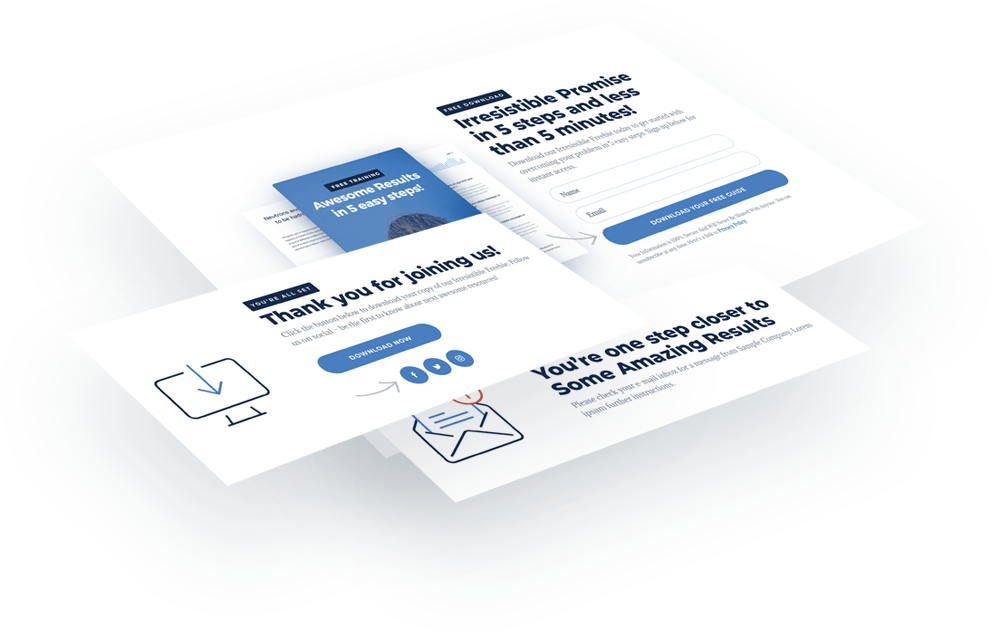
Three Divi pages for your lead magnet: an opt-in page with floating images and an Email Optin form, an e-mail confirmation page and a download page. Works in Divi 5 and Divi 4.
Get the free downloadWant to see it in action first? Take a look at the live demo of the opt-in page.
What’s inside the free layout pack?
One JSON file with three Divi layouts, free to use on your own and your clients’ websites:
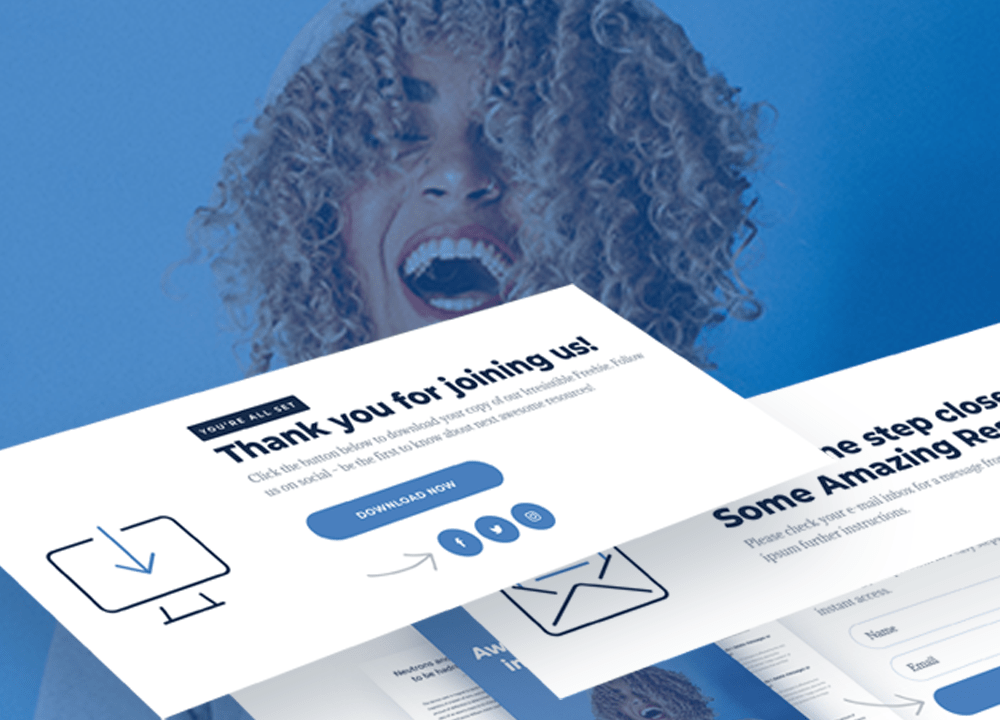
- Lead Magnet - Opt-in Page: three floating e-book images on the left and an Email Optin form on the right.
- Lead Magnet - Thank you Page: the e-mail confirmation page with a floating envelope icon.
- Lead Magnet - Download Page: a floating download icon, a Download Now button and social media icons.
Requirements: the layout pack requires the Divi theme (or the Divi Builder plugin) for WordPress. It is not included with this product. It works in Divi 5 and Divi 4.
Step one: the opt-in page
The opt-in page is the main page: floating images of your freebie on the left and a simple e-mail sign-up form on the right, built with the Divi Email Optin module.
The floating images on the left are made with a little CSS (you’ll find a tutorial on how to create them here). You can add compelling screens of your e-book, and you’re good to go!
Step two: the e-mail confirmation page
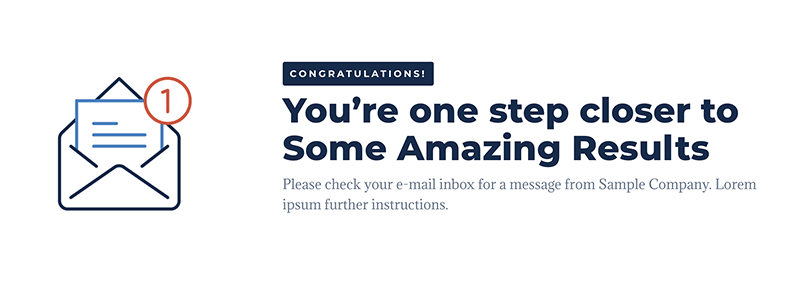
The e-mail confirmation page tells new subscribers to check their inbox and confirm their subscription, which you need if your email provider uses double opt-in.
Whether you need an e-mail confirmation or not, we’ve got you covered. We’ve prepared the layouts of both the confirmation page and the download page, so you can use either one... or both 😉
The e-mail confirmation page also has a neat floating image/icon option on the left, and text fields on the right to encourage your clients to confirm their subscription. Make sure to add an exciting caption!
Step three: the download page
The download page is where your new subscribers get the freebie: a short thank-you text, a Download Now button and links to your social profiles.
The final page lets the client download the irresistible freebie you’ve prepared for them and happily land on your e-mail list. Success!
If you have an alluring lead magnet you’d like to share with the world, but you’re not sure how, you’ve come to the right place. Download our awesome layouts and get new clients right away!

How to import and set up the layout in Divi 5
Import the JSON file into the Divi Library, load each layout into its own page, then connect your email provider and add your own links.
1. Import the layouts
- Divi Library: go to Divi → Divi Library → Import & Export → Import and choose the .json file. You’ll get three layouts in your library.
- Divi 5: create three pages (opt-in, confirmation and download), open each one with the Visual Builder, choose Insert Layout → Saved Layout and pick the matching layout. Divi 5 converts the Divi 4 layout automatically.
- Divi 4: in the builder, click Load From Library → Your Saved Layouts and pick the layout.
2. Connect your email provider
Open the Email Optin module on the opt-in page → Content → Email Account, choose your provider (Divi supports MailerLite, Mailchimp, ConvertKit, GetResponse and many more), add your account and select a list. The layout comes without an email account, so until you connect one, the form can’t add anyone to your list. In Divi 4 the form doesn’t even show on the live page until a list is selected, and a new Email Optin module in Divi 5 hides the form until you pick an account.
3. Send new subscribers to the next page
In the same module, open Content → Success Action and choose “Redirect to a custom URL”. Use the URL of your e-mail confirmation page if your provider sends a confirmation e-mail (double opt-in), or the URL of your download page if it doesn’t.
4. Add your download link and social profiles
On the download page, open the Download Now button and add the link to your freebie file (the button has no link in the layout), then add your own profile URLs to the Social Media Follow icons.
Where the floating animation CSS lives
The floating effect is plain CSS in a Code module called “CSS Code” at the top of the left column on each page. Any image with the class dl-floating moves up and down, and dl-floating1 / dl-floating2 start the animation at a different moment, so the three e-book images don’t float in sync. This is the CSS from the opt-in page:
.dl-floating {
  animation: floating 7s ease-in-out infinite;
}
.dl-floating1 {
  animation-delay: -4.5s;
}
.dl-floating2 {
  animation-delay: -3s;
}

@keyframes floating {
    0% {transform: translate(0,  0px);}
    50%  {transform: translate(0, 15px);}
    100%   {transform: translate(0, -0px);}
}

.dl-optin .et_pb_newsletter_footer {
  font-size:.65em;
}
To make your own images float, add the class dl-floating to them: in Divi 5 it’s Advanced → Attributes → Add Attribute → CSS Class (in Divi 4: Advanced → CSS ID & Classes). Change 7s to make the movement slower or faster, and 15px to make it bigger or smaller.
Final thoughts
Don’t forget to take a look at the live demo to see the fun floating animation! If you’re interested in how we created that section with floating images, check out my tutorial on floating overlapping images in Divi.
Heads up for future Divi freebies and tutorials: sign up to my newsletter so you won’t miss them!
We always appreciate your feedback, so let me know what you think in my Divi Lovers Facebook group!